Saturday, March 28, 2015

golgappa/puchka/pani-puri

These little crispy balls filled with delicious spicy stuffing and tangy water is one of my favorite things in the world.I could even kill for one of these.I love the bombardment of various flavors from tangy to sweet bursting into your mouth with a single bite.It has various names In India and various recipes to make them,too.In kolkata we call it puchka.Ask any Bengali about his/her love for puchka and you'll know how faithful we are towards our beloved puchka.A while ago i had tried my hands on making these lovely puri's.The results were umm,let's just say satisfactory.Yesterday i tried making them again.And it was a complete disaster.Only 4 of them puffed up.Now neither do i like leaving things mid way nor did i want those soggy puri's to haunt me forever.Hence it was 11 p.m,5 attempts and 3 different recipes with no such success.It was the 6th and the final attempt today that the puri's turned out crispy and delicious.The recipe that worked for me was adapted from "cooking shooking".Thanks a ton to Yaman agarwal for such an easy and simple recipe.

But before i share the recipe i would like to discuss certain points about the three recipes that i followed(i am not saying that these recipes do not work.All i am saying is it did not work for me).


Recipe -1
i used 1 cup of fine rawa/sooji,3 tbsp of all purpose flour,salt,1/4th tsp of baking soda,water as required and oil for frying.
The prime difficulty that i faced was while kneading the dough.Now here as semolina was the main ingredient with very less flour (which is basically used as a binding agent) hence kneading it(to release it's gluten) into a smooth dough and for a considerably long time was needed.One main thing that should be kept in mind that while rolling the dough there should be no visible cracks on the surface.Mine had a lot of cracks.Also when i fried the puri's it was crisp but not as crisp as we find them in the market.Moreover the skin of the puri's were not translucent and thin which usually gives that cracking sound once you break the puri.Moreover the surface was smooth.A perfect puri should have blisters on it's surface.

Recipe-2
Keeping all the ingredients same i discarded the use of all purpose flour and used only semolina instead.Again i had troubles making the dough.I used a bit of oil to smooth out the surface after kneading.There were cracks again when i rolled the dough.But when i fried them the puris were not translucent and it was paler in colour.I tried the same recipe using little less water and baking powder instead of baking soda.But it didn't make much of a difference.

Recipe-3 (the final one)

Now before mentioning what ingredients i used let me tell you when i tried this recipe at first it was not a success (my fifth attempt).My Each and every puri did puff up but as it cooled it became soggy.I understood the reason once i tried the last and the final attempt-The 6th one.

Ingredients serves-30 bite size puri's

  • 1/4th cup of fine rava/semolina
  • 1/4th cup of all purpose flour
  • 1/4th tsp of salt
  • Pinch of baking soda
  • A bit less than 1/4th cup of water
  • oil for frying


Method
  1. Mix rava,flour,salt,baking soda together.I always prefer sifting it.But it's not mandatory.Add water little at a time.Form a smooth dough.Using equal quantities of semolina and flour helps in forming the dough a lot faster and easier.The dough will be semi stiff and not completely soft.
  2. Once the dough is formed wrap the dough in a damp kitchen towel for around 30 minutes.
  3. After 30 minutes is over heat up oil for deep frying.
  4. Meanwhile divide the dough into two portions roughly.Dust the counter or the place where you are going to roll the dough with a little bit of flour and take a portion of it and start rolling it on the counter.
  5. Roll the dough as thinly as possible.There should be no cracks.It should be translucent.By that i mean once you are finished rolling you can see the slight glimpse of the counter top from your rolled dough.Or when you hold the rolled dough in front of sunlight you can see the light passing through.Not smoothly but to a certain extent.
  6. Cut them into circular shapes with the help of a cookies cutter or anything round and sharp.
  7. Once the oil is fairly hot bring the flame to medium and drop the puri's.They should puff up immediately.Move the puri's around in the oil so that they get equal color from all the sides.Rotate them once in a while.
  8. Once they turn golden brown from all the sides your puri's are ready.Stuff some delicious filling inside it of your choice.serve it with spicy water and Eat it up! :)
Tips:-
  1. The semolina should be of a fine variety.This is very important for a fully puffed up and crisp puri.
  2. The oil plays a very vital role in the crispness of the puri's.The oil should be considerably hot.If the oil is not hot enough your puri's will puff up but once cooled they'll be soggy.To test the oil is hot enough or not once you feel your oil is hot enough drop a tiny piece of the dough into the oil.If it floats into the oil instantly you'll know your oil is ready.
  3. Now covering the dough with a damp cloth is necessary.If the cloth is too wet the dough will soak up a lot more water/moisture than what is needed and won't puff up and if the cloth is dry then the dough will get dry and crack might appear.Again resulting into a soggy puri.
  4. Rolling the dough thin is another important factor for a puffed up and crispy puri.
  5. While dusting the counter with flour be extra careful not to add a lot of flour to roll the dough.Else the dough might become dry.
  6. You can keep these puri's outside for quite a long time.Like an entire day almost.It won't become soggy.For longer use store them in an air-tight container.
  7. Only a pinch of baking soda is needed.If baking soda is not added the puri's should still puff up.This is added only to be extra safe and sure.

Wednesday, March 25, 2015

Eggless glazed donut

When it comes to desserts indulging eggs into sweet treats doesn't go with me very well.Hence i prefer sticking to eggless recipes most of the times.One of such eggless delights are these round fried dough with a hole in the middle popularly known as donut.This dessert is an all time American favorite  dessert which is simple and easy to make with just few ingredients.This is Nisha Madhullika ji's recipe.I love how she explains all the recipes with such an ease.As said before the method of making these are easy peasy with few important ingredients which cannot be skipped at all.There are three important ingredients-yeast,lukewarm milk and patience.Few people faint in the name of yeast.But don't worry!The yeast used here is an active dry yeast which means activation of the yeast separately is not required.Now the lukewarm milk is another important step for making a soft donut.When we say lukewarm by that we mean that the milk should be at such a temperature that when you dip your finger inside the liquid it should be neither that hot that your finger burns nor that cold that your finger feel nothing.It should be a bit warm.As i said before patience is an important factor here.In this recipe i have done 2 proofing of the donut which means you need a lot more patience than ever.Remember good things or rather sweet things comes to those who wait.


Ingredients serves-10 donuts


  • 2 cups of all-purpose flour
  • 3/4th cup of lukewarm milk
  • 1/4th cup of softened butter at room temperature
  • 2 tbsp of sugar (salted or unsalted)
  • 1 tsp of active dry yeast
  • 1/2 tsp of salt if unsalted butter is used
  • Donut cutter
  • oil for frying
Method

  1. Mix flour,sugar,yeast,(salt) in a mixing bowl.
  2. Add in the butter and mix well.Once done add in the milk a little at a time.While i made the dough around 1 1/2 tbsp of milk was still left.Knead the dough for atleast 6-7 minutes(kneading is very important).The dough once kneaded should be springy and soft.Dust flour or grease the bowl with oil and cover the dough with a cling film.Keep it for atleast 30 minutes.Do not refrigerate the dough. (first proofing)
  3. After 3o minutes you'll notice the dough has become double the size and a lot more softer.Knead the dough again for 2-3 minutes.Dust the counter with a little flour and roll the dough into 1 or 1/2 cm thickness.The dough should be neither too thick nor too thin.Brush them with melted butter or oil so that it does not become too dry.
  4. Cut the donuts with the help of a donut cutter.If you don't have a donut cutter you can always improvise with a glass and a cap of a bottle.
  5. Proof them again for another 2-3 hours.You can either dust the surface with flour and place the donuts or use butter paper.They will puff up .
  6. Heat up oil in a pan for deep frying.Once hot add the donuts and fry till golden brown.To test whether the oil is hot enough or not drop a piece of the dough.If it immediately floats on the oil your oil is ready.
  7. Your soft and delicious donuts are ready.You could either dust them with powdered sugar and cinnamon or just glaze them with sugar glaze,honey glaze or chocolate glaze (for the chocolate glaze melt compound chocolate and dip the donuts directly or add food color into the melted chocolate for that extra oomph).Once you are done giving that last touch to your donuts grab one and Eat it up!:)
Tips:-

  1. You can even bake them into a pre-heated microwave in convection mode at 180 degrees for around 13-15 minutes or till golden brown.

Tuesday, March 24, 2015

watermelon mint granita

Italians have always known for their simple yet filling recipes.Like their wine and cheese they even love their desserts.The invension of the creamy and rich Gelato is one of the testimonies to the flavorful Italian cuisine.Another invention that gave it's way into the Italian kitchen was Granita.Originated in Sicily this is the most easiest dessert to make.Moreover,it's calorie free and healthy.Itialians like to use minimal ingredients and less time to make scruptious meals for their family. Proving this theory the granita requires only few ingredients resulting into a refreshing dessert.The tiny sparkling crystals of the granita looks stunning when filled in short or martini glasses.This is a semi-frozen dessert which is a great way to beat the heat and very popular among kids,too.


Ingredients Serves-3 people
  • 1 and 1/2 cup of roughly diced watermelon
  • 1 tsp of sugar (optional)
  • Handful of mint leaves
  • 1/2-1 tsp of lemon juice
  • pinch of salt
Method
  1. Put everything in a mixer or a juicer.And blend everything.
  2. Strain the liquid.And pour it in a square or a rectangle tray which is a bit deep.I used a plastic rectangle tiffin box that i had with me.It is not necessary to use a rectangle or square shape container.But make sure the container is a bit deep and wide enough so that when you scrape out the ice it becomes an easy task.
  3. Keep the liquid into the freezer for at-least 2-3 hours.
  4. After half an hour take out the container out of the freezer.you'll notice that the ice has just started forming on the sides and surface of the liquid.Stab it with the fork and break the ice.Keep it inside the fridge again.
  5. In between every half an hour or one hour take out the container and break the ice with the help of a fork.This is done so that the liquid does not from into a solid block of ice.It should appear like tiny ice crystals.After 3 hour's the granita will puff up when you scrape it with fork.
  6. Your granita is ready to be served.Spoon them into dessert glasses and serve immediately.You can even sip it through a straw or just Eat it up! :)
Tips:-
  1. Once you are ready to serve these granita's to your family or your guests only then bring them out of the freezer and serve.
  2. Keeping a check on the granita and breaking the ice after certain intervals(1/2-1 hour) is necessary.
  3. This is a semi-frozen dessert hence can be eaten with dessert spoon as well as sipped with a straw.
  4. Instead of watermelon,grapes,pineapple,strawberry,orange,lemon or even coffee can be used to make granita's of your choice.

Friday, March 20, 2015

Butter chicken (murgh makhani)

Like every bong knows how to cook their fish i believe every Punjabi knows how to cook their chicken.Butter chicken is one of such delicious dishes that comes out of a Punjabi kitchen.The combination of butter and chicken is a perfect marriage of flavors.This creamy,buttery butter chicken lingers onto your palate even after you have licked the last spot out of the bowl.If you love chicken this is a must try dish.


Ingredients Serves-2 people
For the marination

  • 100 grams of  yogurt
  • 250 grams of boneless chicken
  • 1 tbsp of ginger and green chilly paste
  • 1 tbsp of kashmiri red chilly powder
  • 1 tbsp of coriander powder
  • 1 1/2 tsp of cumin powder
  • Pinch of cinnamon powder
  • Salt to taste
  • 1/2 tsp of butter (optional)
For the gravy

  • Shallow fried chicken pieces
  • 2 medium sized tomatoes roughly chopped
  • 1 onion roughly chopped
  • an inch of ginger cut into slivers
  • 1 green chilly cut into slits and seeds removed
  • 3-4 cardamom pods
  • 3-4 cloves
  • 1 piece of cinnamon
  • 2-3 heap table spoons of fresh cream
  • 4 tbsp of butter
  • 1 tbsp of oil
  • 1/4th tsp of sugar
  • salt to taste
Method
  1. Marinate the chicken with the above said ingredients and keep it into the fridge for at least an hour.
  2. After an hour take it out of the fridge and thread them into the wooden or metal skewer.Attach at least 4 cubes into a single skewer.(if you choose a wooden skewer over the metal ones don't forget to soak them in water for at-least half an hour before you use them.As they might burn if used directly)
  3. Add 1-2 tbsp of oil on a non-stick tawa and place the chicken skewer on it.Rotate the skewer once a single side gets browned.
  4. To make the gravy add 2 tbsp of butter and 1 tbsp of oil so that the butter does not burn.
  5. Once the butter melts add in the cloves,cardamom and cinnamon.Stir till it releases it's aroma.

  6. Add in the ginger slivers and green chilly slits.Cook for sometime.

  7. Add in the onions.Cook till it becomes translucent.
  8. Drop in the tomato pieces.Cook till the tomato pieces gets soft.Grind everything in a mixer once cooled.
  9. Heat the same kadhai again.Add in the rest of the butter.
  10. Once the butter melts add in the onion and tomato puree(add water if needed).Add in the red chilly powder,salt.Cook for a while.
  11. Add fresh cream and mix.
  12. Drop in the cooked chicken pieces.
  13. Cook for another minute or so.And your yummy restaurant style butter chicken is ready to be served(you can even add 1 tsp of kasuri methi crushed between your palms at the end to enhance the flavors).Serve it with your naan or just plain roti and Eat it up! :)

Wednesday, March 18, 2015

Kosha Mangsho (spicy mutton/goat curry)

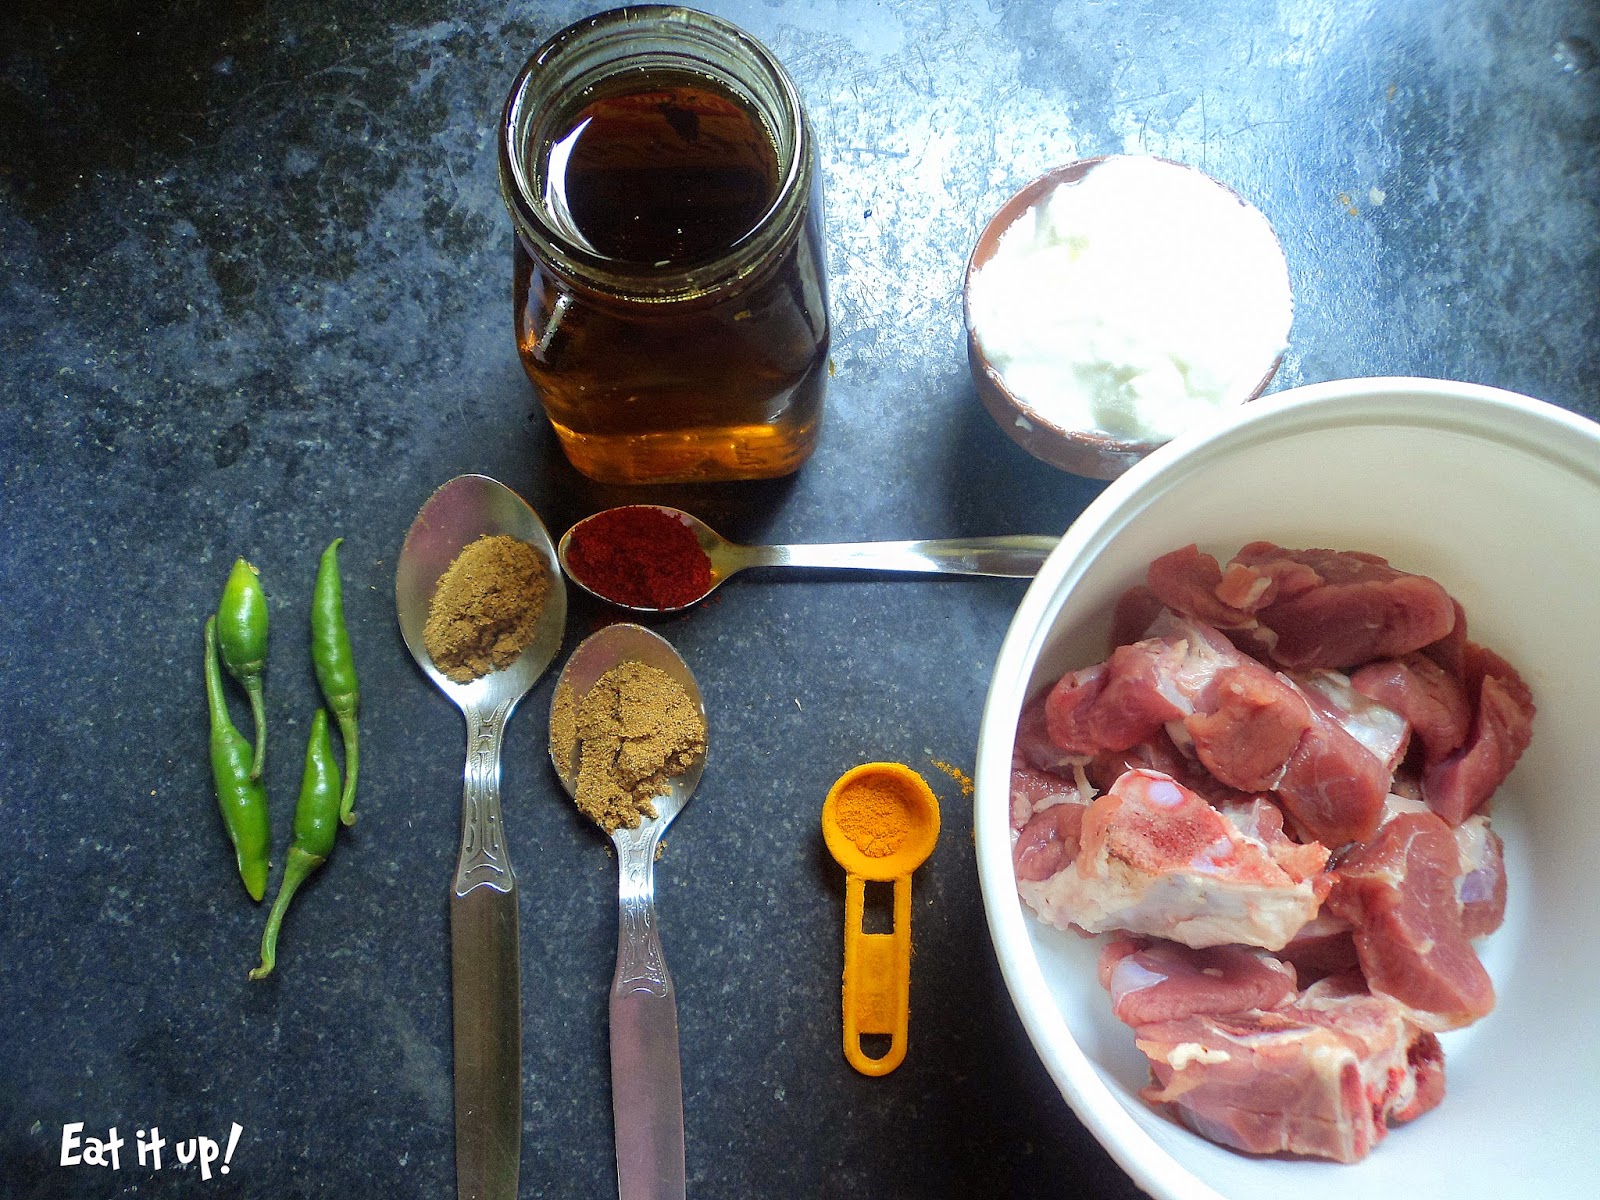
Bengali version of the spicy goat curry or as we call it "kosha mangsho" is another variant in the diverse Bengali cuisine.Apart from aur mishti doi and beloved mach we even love our meat,too.This goat curry is thick,rich of flavors and perfect justice to the goat meat.During the olden days the ladies used to cook their meant on their hand made earthen oven under slow cooked fire.Which gave the meat it's tenderness.It also gave enough time for the spices to bind with each other perfectly.But now gone are the days of slow cooking and earthen ovens.With drastic changes in our lifestyle we hardly have time to spend in the kitchen slaving for our to cook our currys.We opt or super-fast solutions without compromising the tastes.Hence this goat curry is an answer to those who avoid long hours into the kitchen and to those who don't mind trying something new.


Ingredients Serves-2 people

For the marination

  • 250 grams Goat meat (with bones)-250 grams
  • 3-4 tbsp Yogurt-3-4 tbsp
  • 1/2 tsp of cumin powder
  • 1/4th tsp of coriander powder
  • 1 tsp of red chilly powder
  • 1/2 tsp of turmeric powder
  • 3 green chilly's cut into slits (seeds removed)
  • 3 tbsp of mustard oil

For the gravy


  • 2 tbsp of mustard oil
  • 5-6 tsp of onion paste
  • 1 tbsp of ginger garlic paste
  • 1 medium tomato chopped
  • 4 cloves
  • 4 cardamom pods
  • 1 bay leaf
  • 1 whole dry red chilly
  • pinch of garam masala powder
  • 2 large potatoes cut into halves(not given in the picture)
  • 1/4th tsp of sugar
  • 1 tsp of ghee or clarified butter
  • salt to taste
Method

  1. Marinate the meat with the above said ingredients for at least 3 hours.It helps the meat to become tender and the spices to penetrate into the meat.

  2. Take a cooker add in the mustard oil.Mustard oil has a very pungent smell.So in order to remove this smell the oil while heating should be hot.Once you see that there are no bubbles forming on the oil and smoke comes out it's ready for further use.Add in the whole dry red chilly,bay leaf,cloves,cardamom and sugar.
  3. Saute it for a while and add in the onion paste.Sugar is added to caramelize the onions and to add a tiny amount of sweetness to balance the flavors.
  4. Once the onions caramelize add in the ginger garlic paste.Saute till the rawness goes away.Add in the chopped tomatoes.Cook till the tomatoes turn soft.
  5. Add in the marinated meat pieces into the cooker (while marinating the water separates.while adding the marinated pieces don't add the liquid from the marination right away.)
  6. Drop in the potatoes as well.Cook till oil separates.
  7. Once the oil separates add in water and the liquid left from the marination to cook the meat and potatoes.
  8. Add salt and close the cooker.
  9. Cook till 6-7 whistles.Once the pressure of the cooker goes away add in the garam masala and ghee.Stir thoroughly.Your spicy goat curry is ready.Serve it with luchi's (puri's),paratha's or simply with rice(the way i like it) and Eat it up! :)